
How to Fix Android Car Stereo Touch Screen Not Working (Unresponsive Screen Fix)
Touch digitizer completely unresponsive or frozen? Learn how to run the USB mouse diagnostic bypass, trigger the hidden 5-finger calibration recovery screen, calibrate touch coordinates in Factory Settings, and fix loose digitizer ribbon cables.

Diagnosing an issue where your android car stereo touch screen not working leaves the display completely unresponsive while music continues playing smoothly points to a digitizer subsystem breakdown rather than an unrecoverable motherboard failure.
Automotive Android head units—including Topway, FYT, Allwinner, and Rockchip platforms—separate visual image rendering from tactile touch input.
The internal GPU drives the liquid crystal display (LCD) panel to output high-resolution graphics.
Conversely, touch inputs are processed independently by a capacitive digitizer glass layer bonded to the front plastic bezel.
When the screen displays crisp graphics but completely ignores physical finger taps, discovering your android car stereo touch screen not working rarely indicates shattered internal electronics.
In routine workshop bench testing, the root cause is almost always corrupted touch coordinate tables, electrostatic saturation across the sensor grid, or an unseated flexible flat cable (FPC) connector inside the chassis.
Before unbolting dashboard trim panels, a systematic series of bench diagnostics will isolate whether the lockup is a simple firmware glitch or a physical hardware fault.
Here are five workshop-tested steps to resolve why an android car stereo touch screen not working condition occurs and restore fluid touch responsiveness.
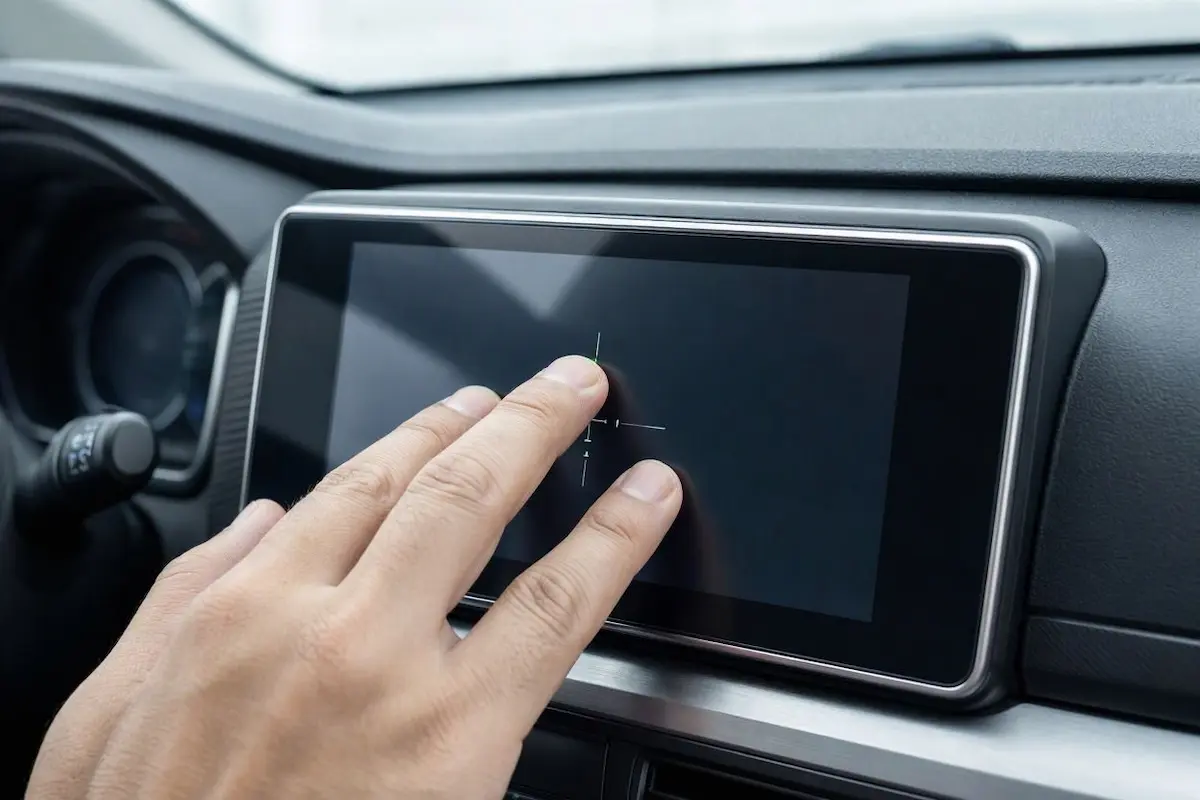
Diagnostic Matrix: Why an Android Car Stereo Touch Screen Not Working Glitch Occurs
Match your specific vehicle symptoms against our workshop failure matrix to isolate an android car stereo touch screen not working failure before modifying system settings:
| Observed Touch Symptom | Underlying Hardware / Software Cause | Immediate Workshop Action |
|---|---|---|
| Screen on, audio plays, zero touch response anywhere | Digitizer driver lockup or corrupted coordinate memory. | Connect a USB mouse to verify OS; run 5-finger calibration. |
| Touch registers on one side, but dead on the opposite edge | Physical dead zone or fractured Indium Tin Oxide (ITO) trace. | Reseat internal digitizer FPC ribbon or replace outer glass. |
| Tapping an icon on the left opens an app on the right | Inverted horizontal/vertical touch coordinate matrix. | Re-map coordinates via Factory Settings “Touch Study” menu. |
| Screen triggers random ghost touches automatically | Trapped moisture beneath plastic bezel or ground static build-up. | Dry bezel perimeter with low heat; perform 15-minute battery drain. |
| Touch functions when cold, but dies once cabin heats up | Thermal expansion micro-fracture along digitizer ribbon pins. | Inspect, clean, and re-clamp the digitizer ribbon ZIF connector. |
Preliminary Triage: The USB Mouse Test (OS vs. Digitizer)
Before disassembling any dashboard components, you must determine whether the underlying Android operating system has crashed or if only the capacitive touchscreen digitizer layer has stopped communicating.
This zero-cost workshop test isolates the problem in thirty seconds:
- Grab any standard wired or 2.4GHz wireless USB computer mouse.
- Plug the mouse cable or wireless receiver dongle into one of the radio’s rear USB pigtail ports routed into your glovebox or center console.
- Move the mouse across a flat surface. A standard mouse cursor arrow will immediately appear on your Android car stereo screen.
- Click on application icons, pull down the status shade, and navigate menus:
- If the mouse cursor moves and launches apps normally: Your Android system, RAM, processor, and motherboard are 100% healthy. The breakdown is strictly limited to the touch digitizer glass, coordinate calibration, or internal ribbon connector.
- If the mouse cursor does not appear at all: The entire Android kernel has suffered a hard system freeze. Proceed directly to hardware power cycling.
Confirming mouse operation proves your core processing board is intact, saving you from replacing the head unit when dealing with an android car stereo touch screen not working scenario.
Step 1: Execute the 4-Finger / 5-Finger Hardware Calibration Gesture
Most aftermarket Android head units contain a kernel-level hardware calibration shortcut programmed for assembly line technicians when touch coordinates desync during firmware flashes.
Running this recovery shortcut is the fastest software fix when an android car stereo touch screen not working error follows a system crash or sudden battery voltage drop:

- Turn your vehicle ignition key to the ACC or ON position.
- Thoroughly clean the glass surface with a dry microfiber cloth to remove skin oils, condensation, and dust.
- Place 4 or 5 fingertips flat and spread apart across the center of the display simultaneously.
- Press down firmly without sliding your fingers across the glass for 10 to 15 continuous seconds.
- If supported by your MCU firmware, the unit will emit a confirmation beep and display a white or black calibration screen with a crosshair (+) in one corner.
- Accurately tap the exact center of each crosshair (+) as it moves across the four corners to rebuild your coordinate mapping table.
⚠️ Calibration Accuracy Rule: Never use a broad thumb during crosshair calibration. Use a fine rubber stylus or the tip of your pinky finger to tap the dead center of the crosshair. Tapping even two millimeters off-center will misalign touch accuracy across the entire glass surface.
RELATED TROUBLESHOOTING GUIDE
Step 2: Access Factory Settings to Re-Calibrate Touch (“Touch Study”)
If the multi-finger gesture does not trigger, use the USB mouse connected during preliminary triage to access the engineering menu.
Overwritten coordinate configuration files frequently cause touch registration failures until reset in the developer console.
Re-mapping soft keys inside factory settings terminates situations where an android car stereo touch screen not working issue locks out volume controls:
- Using your connected USB mouse, open the application drawer and click Car Settings → Factory Settings.
- Enter your head unit platform passcode (common codes include
8888,1617,3368, or0000). If your model requires a specific PIN, check our master list of Android car stereo factory settings passwords. - Locate the menu option labeled Touch Study, Touch Area Setting, or Screen Calibration.
- Click Start Calibration (or Clear Coordinates).
- Follow the onscreen prompts to tap screen corners and assign soft-touch bezel keys (Power, Home, Back, Volume +, Volume -).
- Click Save & Reboot to commit the new coordinate matrix permanently to non-volatile flash memory.
Step 3: Discharge Ground Static Build-Up (Capacitive Power Cycle)
Capacitive digitizers detect minute microampere electrical disturbances created by your skin.
During dry winter weather or in vehicles with minor alternator diode ripple, electrostatic charges can accumulate across the glass surface.
This static saturation blinds the digitizer controller to finger touches, making your android car stereo touch screen not working intermittently:
- Turn off your vehicle and remove the ignition key.
- Locate the tiny RST pinhole on the radio faceplate. Insert an unbent paperclip and hold the internal tactile switch down for 15 continuous seconds.
- If the pinhole reset does not restore touch response, pop your vehicle hood.
- Loosen the battery terminal nut and disconnect the Negative (-) battery clamp.
- Leave the battery disconnected for 15 full minutes to allow power supply filter capacitors on the digitizer PCB to drain completely to chassis ground.
- Reconnect the battery clamp tightly, turn the ignition to ON, and test touch responsiveness.
Draining residual static clears persistent microcontroller memory stalls that make an android car stereo touch screen not working glitch persist across restarts.
Step 4: Inspect and Reseat the Digitizer FPC Flat Ribbon Cable
Vibrations from rough roads, expansion cycles from summer cabin heat, and engine vibrations can cause the delicate ribbon cable connecting the front digitizer glass to slip out of its Zero Insertion Force (ZIF) motherboard socket.
An unseated ribbon cable is the leading mechanical reason why an android car stereo touch screen not working failure occurs while the underlying LCD panel remains brightly lit:
- Use plastic trim tools to unclip the dashboard bezel and extract the stereo chassis. Check our guide on how to connect factory wiring to android head unit looms if you need harness references.
- Remove the side mounting screws and gently detach the front glass bezel assembly from the aluminum rear case.
- Locate the thin, flexible flat cable (FPC) routing from the outer glass perimeter to the main circuit board:
- Check for Misalignment: Carefully flip open the small plastic locking bail on the ZIF socket, align the ribbon pins squarely, and snap the clamp down firmly.
- Clean Contact Fingers: If the gold connector pads show oxidation or residue, clean them gently using a cotton swab moistened with 99% isopropyl alcohol, let dry for two minutes, and reinsert.
- Plug the primary power harness in and test touch response before re-installing the stereo into the dashboard. Reseating this cable clears an android car stereo touch screen not working defect permanently.
RELATED TROUBLESHOOTING GUIDE
Step 5: Check for Trapped Moisture and Screen Protector Interference
Capacitive touch sensors rely on direct electrostatic field coupling with human fingers.
External physical barriers or conductive liquid layers can completely disable touch detection while tricking you into assuming hardware failure.
Investigate these two external physical factors before buying replacement panels:
- Moisture Trapped Under Bezel Edges: If you recently detailed your vehicle interior or cleaned the dashboard, liquid spray can wick behind the plastic bezel frame. This moisture creates continuous phantom electrical contacts that lock up the touch matrix. Hold a hairdryer set on low heat approximately 12 inches away from the screen perimeter for 3 minutes to evaporate trapped cleaning fluid.
- Low-Grade Tempered Glass Protectors: Cheap aftermarket screen protectors often lack conductive coatings, creating dead zones—especially during cold winter mornings. Remove the protective film temporarily to verify if an android car stereo touch screen not working issue disappears on bare glass. If your screen is stuck on a brand logo, see our Android car stereo boot loop recovery guide.
Diagnosing an unresponsive car stereo touchscreen comes down to isolating software coordinate corruption from physical connection breaks.
Verifying system health with a USB mouse, executing the 5-finger recovery gesture, re-mapping buttons in Touch Study, and reseating the internal digitizer ribbon cable resolves the vast majority of lockups.
Following this structured bench sequence permanently eliminates an android car stereo touch screen not working error without the unnecessary expense of buying a replacement head unit.
Frequently Asked Questions (FAQ)
Can I still use my Android car stereo if the touch screen is completely dead?
Yes. When an android car stereo touch screen not working problem occurs, you can connect a wired or wireless USB mouse or steering wheel control receiver to the stereo’s rear USB ports to navigate apps, maps, and media playback without touching the screen.
Why does my car stereo touch screen work when cold, but stops when the car heats up?
This behavior points to thermal expansion affecting the digitizer ribbon connector or microscopic fractures along the conductive Indium Tin Oxide (ITO) sensor grid. As the vehicle cabin heats up in direct sunlight, materials expand and sever delicate electrical traces.
How much does it cost to replace an Android car stereo touch screen?
A replacement 7-inch, 9-inch, or 10.1-inch outer capacitive touch digitizer glass panel typically costs between $15 and $28 online. If the underlying LCD monitor displays bright graphics without cracks, you only need to replace the outer digitizer glass rather than the entire head unit.
Why are touch screen buttons working in reverse or upside down?
If tapping the left side opens right-side icons, your digitizer coordinate matrix has become inverted. You can resolve this by connecting a USB mouse, accessing Factory Settings, and executing a Touch Study coordinate re-mapping.