
Android Auto Blurry Screen: 5 Best Proven Fixes for Fuzzy Displays
Fix an Android Auto display that looks blurry, pixelated, or stretched across your car dashboard by calibrating developer video resolution, screen DPI density, and USB bitrate.

Connecting your smartphone to your vehicle expecting sharp navigation maps and crisp text only to discover your android auto blurry screen makes reading highway exit numbers and street names frustratingly difficult.
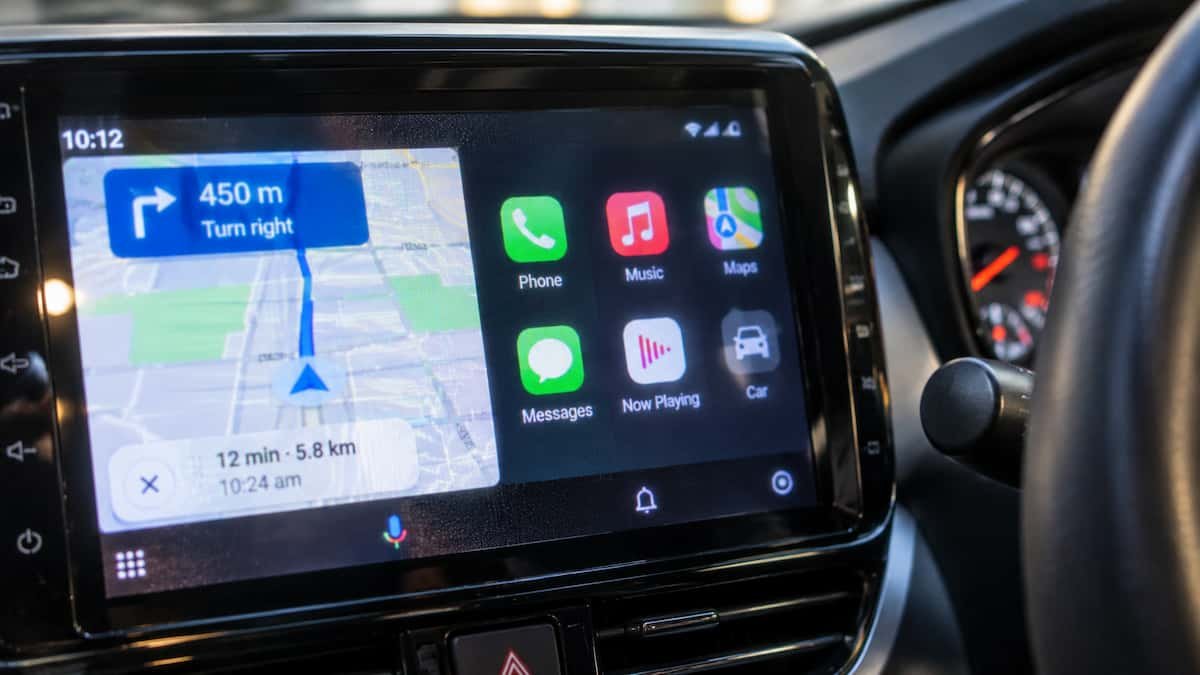
Your vehicle’s touchscreen turns on and projection functions without crashing, but application icons look pixelated, map fonts appear washed out, and the user interface appears stretched or zoomed in awkwardly.
In professional 12-volt car audio diagnostics, an unsharp projection display rarely indicates a broken LCD panel or damaged touchscreen digitizer.
Common causes typically include misnegotiated video resolution handshakes, contradictory DPI density settings inside developer menus, low-bandwidth USB cables degrading dynamic video bitrates, or third-party projection adapter scaling errors.
Because Android Auto renders UI elements on your smartphone’s GPU and streams the compressed video stream across a hardware data link, any mismatch between your car’s native screen resolution and the phone’s rendering profile triggers an android auto blurry screen fault.
Before assuming your head unit is obsolete or spending money on dealership software updates, systematic calibration of hidden developer video controls will restore pin-sharp display rendering.
Here are five practical workshop procedures to troubleshoot why your android auto blurry screen occurs and re-establish razor-sharp visual clarity on your dashboard.
Diagnostic Matrix: Resolving Unfocused Projection Displays
Cross-reference your display’s visual symptoms against our workshop matrix whenever an android auto blurry screen problem degrades your driving view:
| Observed Screen Symptom | Underlying Resolution or Data Cause | Immediate Workshop Action |
|---|---|---|
| Icons and map text look soft, fuzzy, and low-res | Default video stream capped at 480p or 720p negotiation. | Force video resolution to “Allow up to 1080p” in Developer settings. |
| Screen elements look giant, stretched, and zoomed-in | Mismatched DPI (dots-per-inch) software density setting. | Adjust app display density or enable custom DPI scaling in adapter. |
| Display starts crisp, then turns blurry and pixelated | High packet loss over low-bandwidth USB cable or Wi-Fi interference. | Replace cable with a shielded USB 3.1 (10 Gbps) data cable. |
| Colors look washed out with jagged pixel borders | Color space mismatch (RGB Full vs YUV compression limits). | Disable hardware video encoding acceleration in developer settings. |
| Blurriness occurs exclusively through wireless dongles | Wireless adapter bitrate auto-throttling to prevent frame drops. | Access dongle IP portal (192.168.50.2) and lock video bitrate to fixed high. |
Step 1: Force Maximum Video Resolution in Developer Settings
By default, Android Auto allows your smartphone and head unit to negotiate the display resolution automatically upon initial connection.
In many aftermarket head units and factory stereos, the handshake fails to declare native widescreen capabilities, forcing Android Auto to stream at basic 480p or 720p.
When a 720p video feed is stretched across a high-definition 9-inch or 10-inch display, your android auto blurry screen becomes immediately noticeable:
- Open Settings on your Android phone and search for Android Auto.
- Scroll to the bottom of the Android Auto menu to locate Version.
- Tap repeatedly (approximately 10 times) on Version until a prompt appears asking to allow developer settings; tap OK.
- Tap the three-dot overflow menu in the top right corner and tap Developer settings.
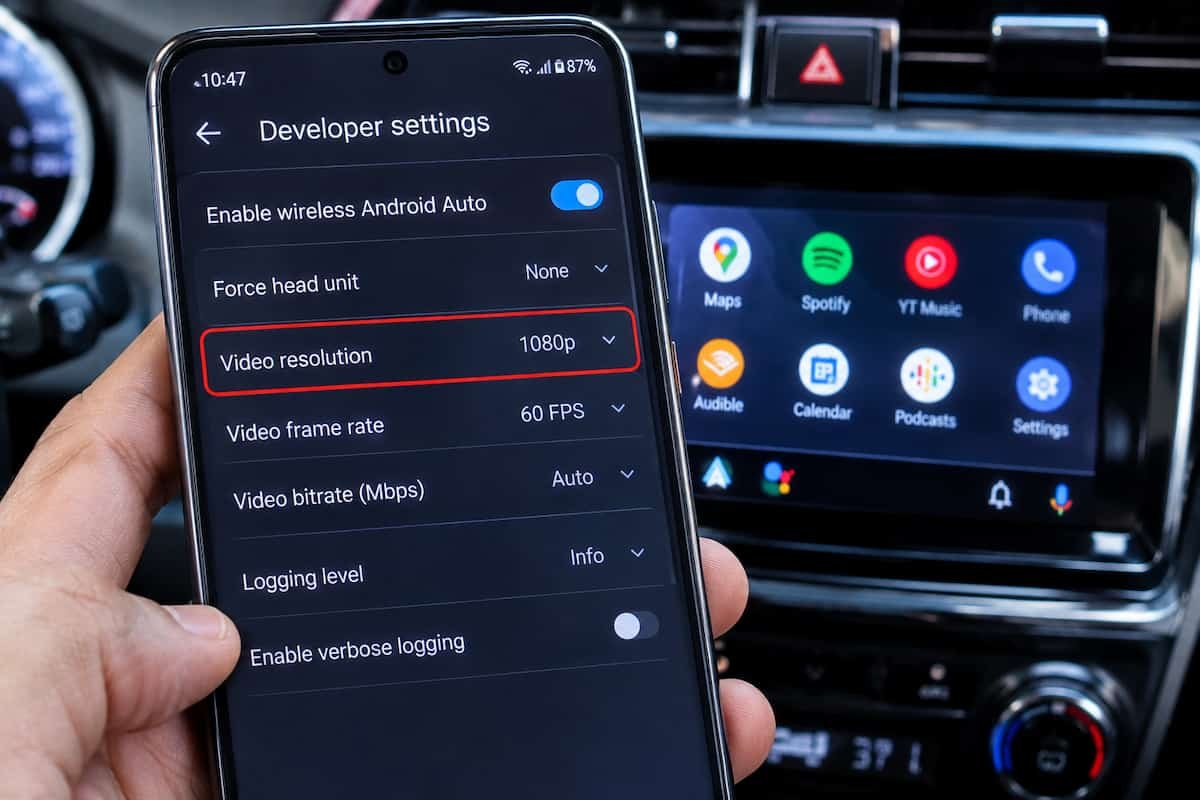
- Locate and select Video resolution.
- Change the setting from Allow car and phone to negotiate to Allow up to 1080p.
- If your car features an ultra-wide display and supports higher feeds, select Allow up to 1440p / 4K if available.
- If your navigation display also gets stuck in daytime colors during nighttime driving, check our guide on fixing Android Auto Google Maps dark mode not working.
Whenever your android auto blurry screen frustrates you, forcing the highest resolution profile commands your smartphone GPU to render graphics at true high-definition pixel dimensions.
For technical reference on automotive display scaling protocols, review the Android Open Source Automotive Display Documentation.
RELATED DISPLAY FIX
👉 Screen flickering, lines, or sudden brightness strobing? Touchscreen hardware diagnosis guide →
Step 2: Calibrate DPI Density and Split-Screen Layouts
Screen DPI (Dots Per Inch) determines how many graphical elements and user interface controls fit cleanly onto a digital display panel.
When the software calculates an incorrect pixel density for your screen dimensions, UI elements appear over-enlarged, jagged, and blurred around text edges.
Recalibrating display density corrects an awkward android auto blurry screen layout fast:
- Open Android Auto Developer settings on your smartphone.
- Look for options labeled Display density or Force desktop mode.
- If using a dedicated wireless projection dongle (such as AAWireless or Carlinkit), open the companion mobile app.
- In the companion app’s advanced settings, locate the DPI slider.
- Change the DPI value gradually: lowering the value (for example, from 200 down to 160 or 140) forces Android Auto to pack more pixels per inch, sharpening fonts and unlocking the modern Coolwalk split-screen layout.
- Save changes and reconnect the device. If your phone feels uncomfortably hot during navigation, review our walkthrough on fixing wireless Android Auto battery drain and overheating.
Fine-tuning software DPI eliminates oversized interface buttons, preventing an issue where your android auto blurry screen looks like an expanded low-resolution smartphone mirror.
Step 3: Replace Damaged or Low-Bandwidth USB Cables
A video stream running at 1080p requires sustained data throughput across your vehicle’s physical USB port.
When a charging-only cable, worn-out lead, or cheap extension cord is used, packet re-transmission errors spike rapidly.
To keep the screen from crashing entirely, Android Auto dynamically drops the video bitrate, leaving your android auto blurry screen covered in compression artifacts and macroblocking:
- Avoid long cables exceeding 3 feet (1 meter), as extended wire runs induce severe resistance and digital packet loss in car cabins.
- Inspect your USB-C connector pins for lint, dirt, or loose contact tension.
- Switch to a certified high-speed cable rated for USB 3.1 Gen 2 (10 Gbps) or USB 3.0 data transfer.
- Connect directly to your car’s primary data USB port (avoid auxiliary 12V cigarette lighter adapters that only supply DC power).
- If your car radio experiences sudden audio skips while navigating, consult our guide on Android Auto audio keeps cutting out.
⚠️ USB Port Current Precaution: Older vehicle dashboard USB ports only deliver 0.5A of current. If your phone battery rapidly drains while driving with a high-resolution display feed, consider using a powered USB data-splitter or switched wireless adapter to maintain steady charging voltage.
RELATED HEAD UNIT GUIDE
👉 Stereo display dark while audio continues playing? Black screen diagnostic walkthrough →
Step 4: Lock Video Bitrate and Frame Rate on Wireless Adapters
If you connect to Android Auto wirelessly via an aftermarket dongle (such as Motorola MA1, AAWireless, or Carlinkit), the video stream is transmitted via a 5 GHz Wi-Fi direct network.
When RF interference from highway toll gantries, radar sensors, or cellular towers occurs, wireless adapters automatically throttle compression bitrates down to prevent audio stuttering.
This aggressive compression algorithm directly triggers an android auto blurry screen during wireless drives:
- Connect your smartphone to the wireless adapter’s Wi-Fi network while parked.
- Open your mobile browser and enter the configuration IP address (commonly
192.168.50.2or access via the dedicated companion app). - Locate the Video Settings or Stream Settings tab.
- Check the Bitrate configuration; if set to Variable or Auto, change it to a fixed High Bitrate (10 Mbps to 14 Mbps).
- Set the Wi-Fi operating frequency to an uncongested 5 GHz channel (Channels 36, 44, or 149).
- Save the configuration and reboot the adapter. For adapter disconnection troubleshooting, review our guide on fixing AAWireless keeps disconnecting.
Locking wireless stream parameters stops adaptive compression from causing an issue where your android auto blurry screen degrades during transit.
RELATED AUDIO FIX
👉 Audio shutting off when turning volume up high? Amplifier thermal cut diagnosis walkthrough →
Step 5: Flush Android Auto Cache and Re-authorize Video Codecs
Following major operating system updates, legacy video decoding cache files can remain stored inside your smartphone’s application directory.
These outdated configuration cache files can lock hardware video encoders into backward-compatible fallback modes.
Clearing application storage cache forces the projection service to rebuild a clean high-definition display profile, permanently curing an android auto blurry screen condition:
- Open Settings > Apps on your smartphone.
- Select Android Auto from the application list.
- Tap Storage & Cache.
- Tap Clear Cache, then tap Clear Storage (this safely resets presentation preferences without deleting personal media).
- Repeat the exact same cache clearing procedure for Google Play Services and your primary navigation app (Google Maps or Waze).
- Reconnect the phone to your car’s USB port, complete the initial setup prompts, and verify that crisp rendering returns immediately. If your Bluetooth toggles freeze on the dash, see our guide on Android car stereo Bluetooth won’t turn on.
Troubleshooting a frustrating android auto blurry screen issue comes down to enforcing native high-definition resolution profiles across your display hardware.
Enabling 1080p resolution inside developer settings, fine-tuning screen DPI values, switching to shielded high-bandwidth USB cables, locking wireless adapter bitrates, and clearing stale video cache files will systematically restore razor-sharp maps and legible text.
Follow these workshop steps whenever visual blurriness ruins your dashboard interface, ensuring you eliminate any android auto blurry screen errors permanently.
Frequently Asked Questions (FAQ)
Why does my android auto blurry screen look pixelated and low resolution?
An android auto blurry screen issue is usually caused by an automatic video negotiation handshake capping output to 480p or 720p, a low-bandwidth USB cable causing bitrate throttling, or mismatched DPI display density settings.
How do I change Android Auto to 1080p resolution?
Open Android Auto settings on your phone, tap the Version number 10 times to unlock Developer settings, tap the top-right three dots to enter Developer settings, select “Video resolution”, and choose “Allow up to 1080p”.
Can a bad USB cable make Android Auto look blurry?
Yes. When a USB cable suffers from signal interference or physical wear, Android Auto’s adaptive video encoder automatically compresses the video bitrate and drops resolution to prevent the connection from dropping entirely.